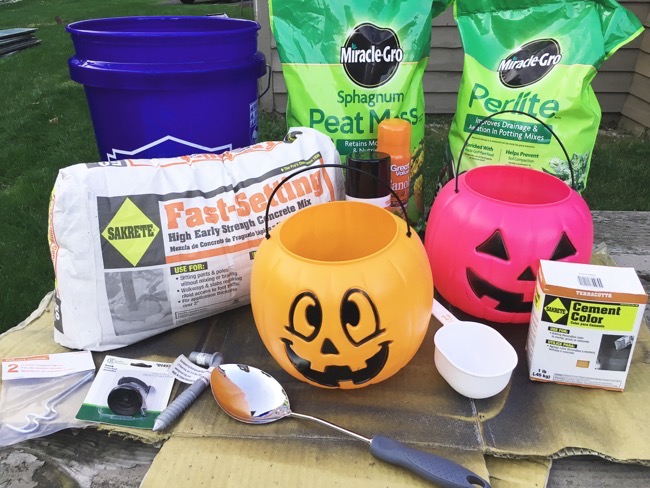
Looking for an alternative to the traditional carved pumpkin or a thoughtful and unique hostess gift? Check out this simple DIY concrete jack-o-lantern. Keep reading for the easy step-by-step instructions.

You will need:
First, spray paint black the metal hooks/spikes that will be used to create the pumpkin stems.
Next, stir dry ingredients in a clean bucket. We used 16 cups of cement, 8 cups perlite and 8 cups peat moss per pumpkin.
Gradually add water until the mixture has a cottage cheese-like consistency. If adding concrete color, add to the wet mixture until desired color is achieved.
Liberally spray the inside of each plastic pumpkin treat bucket with non-stick cooking spray.
Working quickly, ladle concrete mixture into each pumpkin bucket to make a concrete jack-o-lantern. As you go, be sure to work the concrete mixture into all of the crevices of the pumpkin form (we neglected to do this at the top of the last pumpkin, and you can see how craggily it looks!).
Allow the pumpkins to sit for a couple of minutes until the concrete mixture has begun to set, and then add the “stems” to the tops.
Allow pumpkins to set for at least a day. (We know you’re super excited to see how they turned out, but you need to wait until they are dry.)
Using a utility knife carefully cut slices into the side of the plastic treat buckets, following the grooves.
Remove and throw away the plastic pumpkin forms. Voila! Cute concrete jack-o-lanterns! Make a few and leave them as gifts on your friend’s and neighbor’s front porch.
This RetroWON Make Your Own Cute Concrete Jack-O-Lantern first appeared October 28, 2016.
Jackie Baird Richardson is an interior designer, editor at The WON and avid junker. Watch for her design tips and occasional crafting ideas, bringing the outdoors indoors. View all posts by Jackie Richardson