Shooting instructor Annette Doerr breaks down the difference among popular shooting stances, relying on shooting experts Gabby Franco and Joseph D’Ambrosia for advice.
A building is only as strong as its foundation. When shooting, your stance is your foundation. Are you confused about the different shooting stances? I’ll do my best to break them down and help you pick the one that’s best for you.
For most shooters, there are 2 main stances: isosceles and Weaver.
Isosceles: Standing facing the target, your feet should be approximately shoulder width apart. Your shoulders should be squared to the target. With your knees bent slightly, extend the handgun forward, keeping your arms straight and locked, forming a triangular position.
Pros:
Cons:
 Weaver: Standing with your feet approximately shoulder width apart, your strong-side leg should be slightly behind, in what is sometimes called a “boxer’s stance.” Raising your firearm toward the target, your strong arm should be bent. Your supporting arm is extended and bent, with that shoulder closer to the target. Keeping both elbows bent, place opposite pressure on the firearm, pushing with your strong hand, while pulling with your support hand. The supporting elbow can point slightly downward. Bend your knees slightly, shifting your body weight more forward. (Note: many people like to almost lock their strong arm; you’ll have to see what feels best to you and train consistently.)
Pros:
Cons:
While Weaver and isosceles are the most popular stances, variants have developed over the years, all with their own benefits.
Modern Isosceles: Based on the isosceles stance, the modern isosceles uses a more aggressive, leaning-forward position. Your shoulders should be in front of your hips. Your feet should be shoulder width apart with support side forward, and knees should be bent. Leaning forward causes a posture shift which some claim helps the shooter with recoil control.
Fighting: The fighting stance is almost a combination of the Weaver and the isosceles. It is popular in the military/law enforcement circles as it’s a great choice for defensive situations, offering the ability to move and shoot quickly. This is sometimes referred to as a “tactical stance.” While the shooter’s body is squared off to the target, her feet are slightly offset and approximately shoulder width apart with knees flexed. They are positioned similarly to where they would be in a Weaver stance, but are much closer together, thus basically eliminating balance issues that can sometimes occur with the Isosceles stance. Leaning slightly forward, the shooter extends and straightens her arms as she levels her firearm.
Wanting to know more about these, I reached out to two very experienced firearms instructors, Gabby Franco and Joseph D’Ambrosio, to get their takes.
You may recognize Gabby Franco’s name: She’s not only an Olympian, but she’s also an extremely experienced professional firearms instructor. I wanted to know what stance she starts her beginners with. Here is what Ms. Franco had to say:
I basically use the isosceles position to shoot, and that is what I teach my students. I have found this position is very effective, because it allows me to absorb the recoil more efficiently; therefore I can shoot faster. I also like this position because it allows me to fully extend my arms for better recoil management. My arms always extend the same way; my body squares up to the target the same way, and so I find the consistency and the perfect muscle memory repetition that I want!
I also reached out to Joseph D’Ambrosio. Joseph is a retired U.S. Army veteran and Purple Heart recipient, firearms instructor and marketing professional. As an experienced instructor, Joseph had some great advice:
For stances, I recommend a variation of the modern isosceles stance for all shooters, especially females. There are a number of reasons why:
This stance places your body in an aggressive, athletic stance. Think about how a sports player would naturally stand, or a fighter. Feet spaced roughly shoulder width apart, slight bend in the knees, hips “squared” with the target, slight lean forward at the waist. That’s the general isosceles stance.
What I like to emphasize is leaning forward aggressively at the waist, like you see in that photo I sent over. The reason is that by putting our body weight forward, we are mitigating the force of felt recoil and ensuring consistency in our presentation.
Female students of mine on the range have always had better success with this aggressive and squared posture than in the more traditional Weaver stance. By keeping hips squared toward the target with an athletic posture in the legs—think how you would stand when catching a ball—and aggressively driving the weapon forward in the centerline of the body, any felt recoil or physical interaction in, say, a self-defense situation is mitigated by using the body’s natural structure for stability and support. This is more often vital for the typically smaller frame or body mass of females as opposed to males. This stance ensures consistency and speed through natural body mechanics. While some folks are more athletic than others, everyone has had some experience with some type of sport—it’s a natural form for shooters of all size.
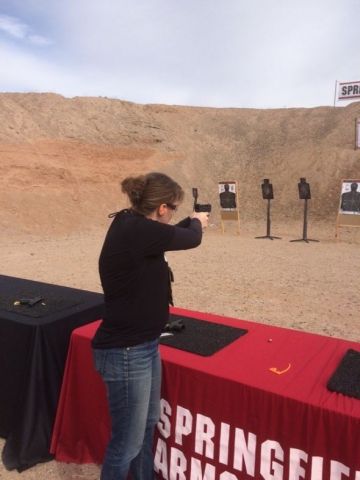
When I learned to shoot several years ago, I was taught with the Weaver stance, likely because I was taught by a retired police officer. While I knew about the other stances, I hadn’t spent much time practicing them. After reading Gabby and Joseph’s advice, I spent some time at the range testing out the various stances. To my surprise, although I was new at using the isosceles stance, I found my groupings to be tighter right from the start. I’d have to assume that the stability it offers works best with my body type, helping to handle the recoil of my 9mm, just as Gabby and Joseph suggested!

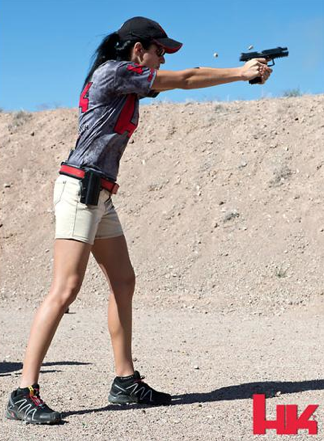
Maria Harbin in an isosceles stance with a slight modification. Put your strong leg back a little. (HK photo)
There are pros and cons to any stance. A competent shooter needs to train, train, train. Your muscle memory will take over in an emergency, and by training you reinforce this. It’s a great idea to practice with any and all shooting stances. It’s also imperative that you train yourself to shoot one-handed, with both your strong hand and your off hand. Should you find yourself in a situation that renders your strong arm immobile, being able to shoot accurately with your off hand could save your life.
Next time you hit the range, spend a little time trying a stance you don’t normally use. You might just find yourself shooting tighter groups, like I did!
Gabby Franco is an Olympic pistol shooter and author, who appeared on Top Shot and Top Shot All Stars. She is an experienced firearms instructor, an active competitor in USPSA, and a good friend of TeamWON!
Joseph D’Ambrosia is a U.S Army veteran and Purple Heart recipient. He served 2 combat tours in Operation Enduring Freedom while with the 10th Mountain Division.
Annette Doerr is a freelance outdoor writer and business services consultant living in suburban New York. This married mother of two is an NRA Certified Pistol Instructor and Range Safety Officer. Annette is not only passionate about the sport of shooting, she also loves helping new shooters get involved, especially women and teens. An active equestrian, she enjoys riding her American Quarter horse, Cody. She volunteers in greyhound rescue and adoption, and shares her home with Casper, a rescued racing greyhound, along with her her cat, Tony, and her husband, Bob. Visit Annette at WeShoot2.com, her personal blog. View all posts by Annette Doerr